Update to ConnectWise REST API
ConnectWise will soon be retiring its original integration methodology in favor of an upgraded process. They’re updating the old SOAP based integration method with the new REST communication format. ConnectWise is no longer answering questions or fixing bugs for the SOAP connection and plans to turn it off completely later this year.
In anticipation of this upgrade, we recently made a change in the ConnectBooster portal to give partners a seamless transition to the new ConnectWise integration format.
Take a few minutes as soon as possible to update your portal. Just follow the steps below to ensure you won’t be negatively affected by the upcoming ConnectWise integration changes.
Note: Your ConnectWise admin or another team member with elevated permissions for ConnectWise may be needed to access some of the areas described below.
- Login to your ConnectBooster portal’s administration area. Navigate with the three bar menu Settings + Integrations. Click on "New Integration", and select "ConnectWise".
- Next login into ConnectWise with credentials for a user which has access to the Member Management area of you ConnectWise.
- Navigate to System > Members, and select the API Members tab at the top. (Note: If you do not see an API members tab, you may need to click the Gear icon and move it to the displayed tabs list)
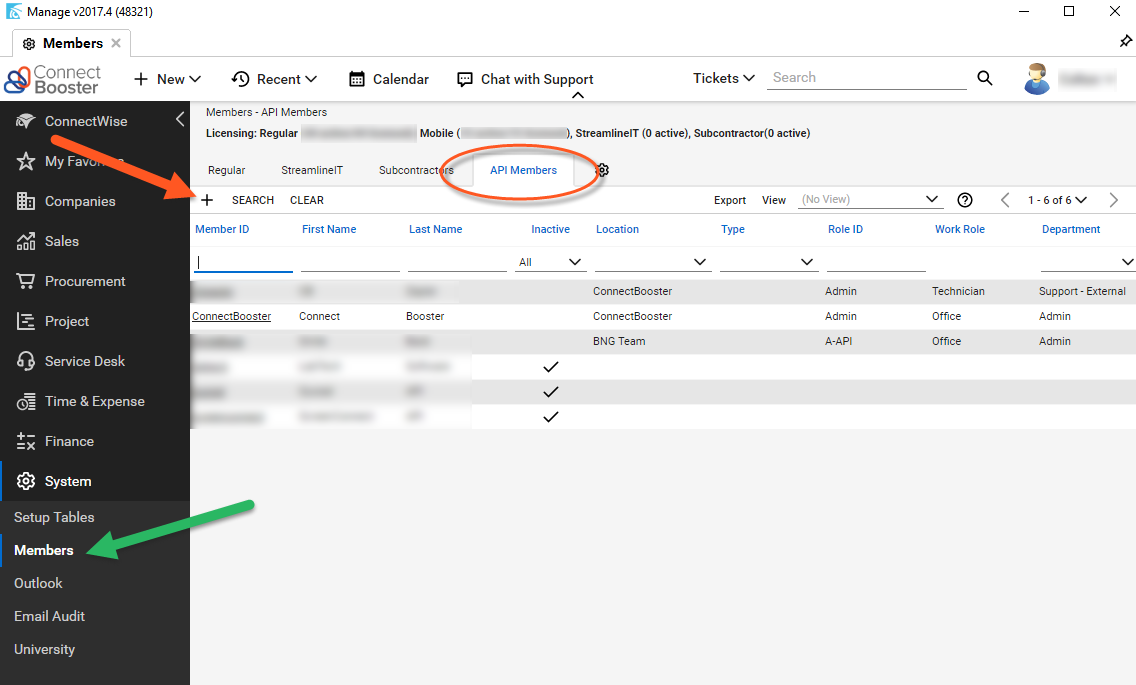
- API Members are a special class of ConnectWise member and do not occupy a ConnectWise license.
- Use the plus sign (+) to add a new API Member.
- On the new member creation page, you may set the Member ID to “ConnectBooster.”
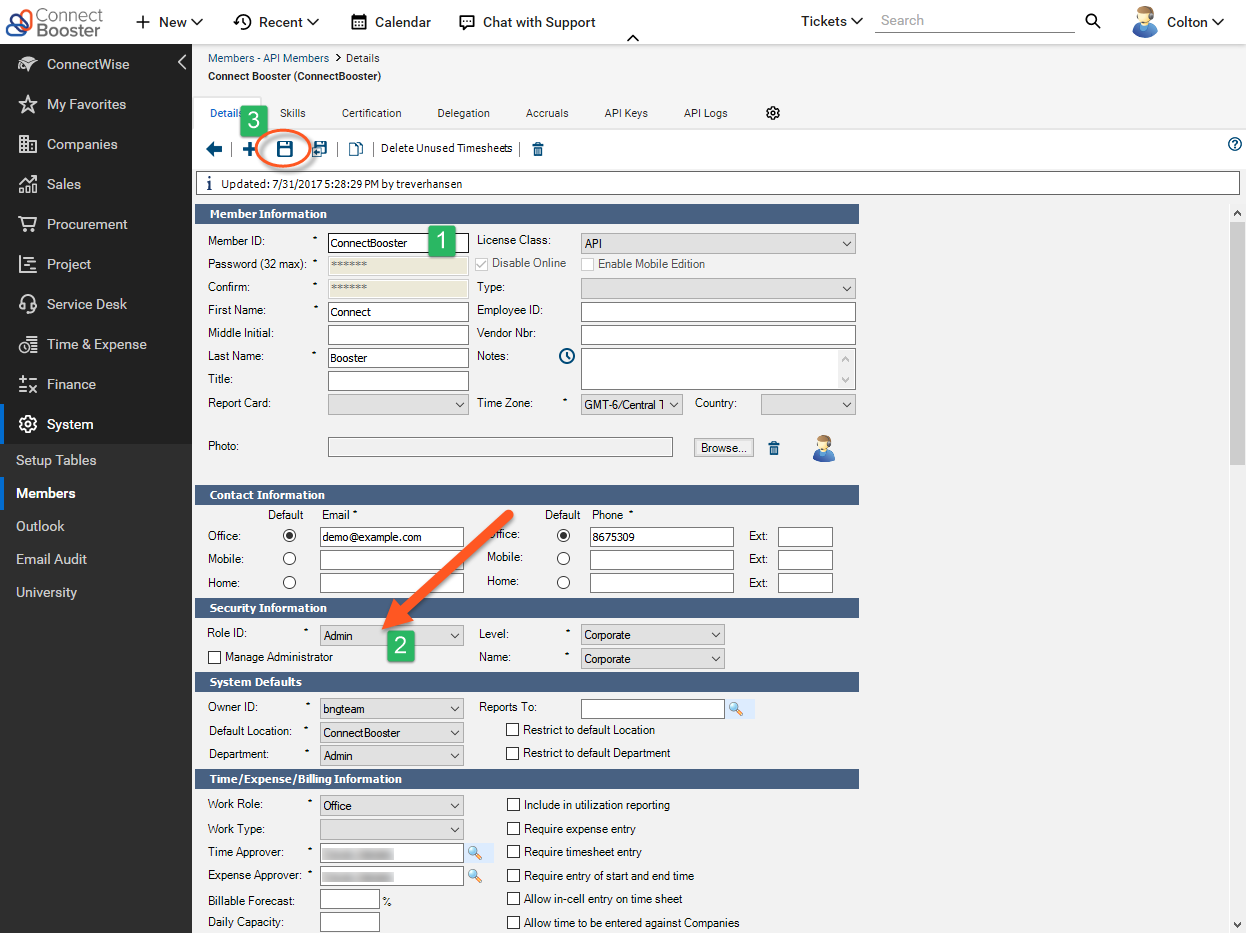
- Continuing on, you will note a series of required fields denoted by asterisks. Fill out each of required fields in both under both the Member Information and Contact Information areas with made up values of your choosing.
- Under Security Information, set the Role ID to Admin or a similarly high-level role and make a selection for both Level & Name as well.
- Continue to make selections for the required entries in the System Defaults, Time/Expense/Billing Information, and Sales Information, bearing in mind this API Member will need to access information for all the customers listed in your ConnectBooster portal.
- With the required fields completed, save the new API Member profile. You need not Save & Close (#3 in screenshot).
- Next, select the API Keys tab above and to the right of the options to save. (Note: Again, if you do not see an API Keys tab, you may need to click the Gear icon and move it to the displayed tabs list)
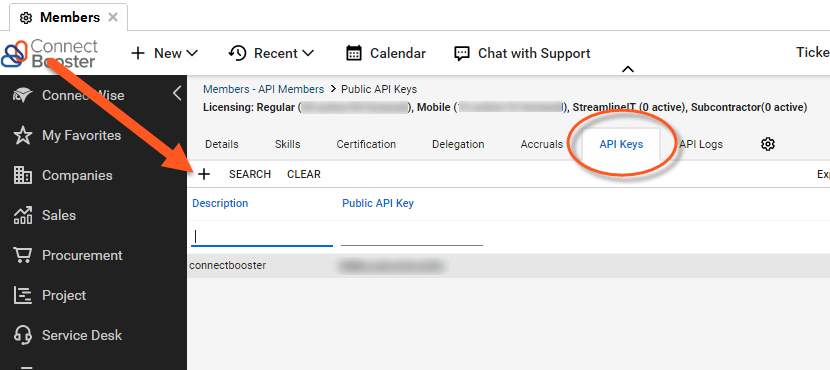
- Use the plus sign (+) to add a new API Key. For the key description, you may again use “ConnectBooster."
- Once again Save the item to generate the new Public and Private keys. DO NOT Save & Close as the Private Key will disappear after the creation pop-up is closed.
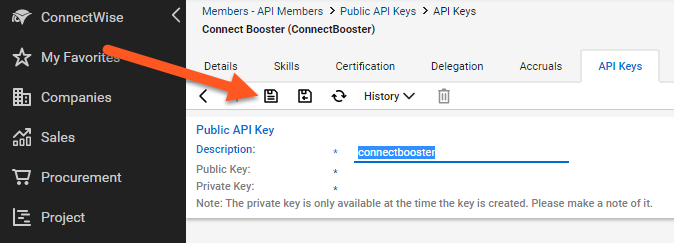
- Copy and document the public and private keys for your records.
- Return to the ConnectBooster portal and place each of the newly generated keys into the respective fields provided. (Note: Be sure to look out for and remove blank spaces which may get added to the beginning or end of these keys if they are copied and pasted from ConnectWise into your portal settings.)
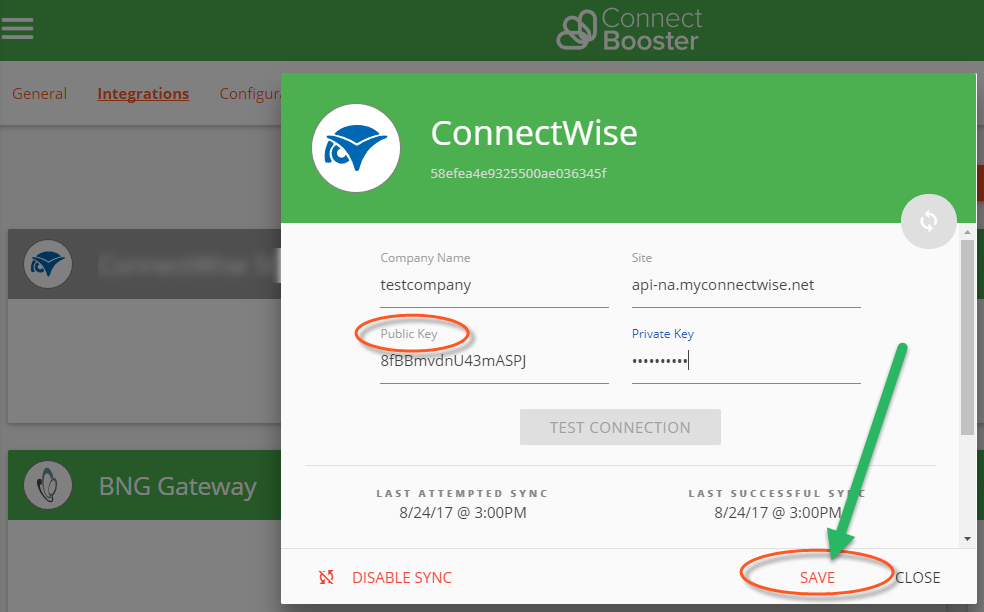
- Save the new keys.
- Remove the "SOAP" connection.
- Congratulations! Your portal is now using the newest communication method and you need not worry about the discontinuation of the previous means of integration.
Customer support service by UserEcho
